portrait

Professional Practice - Google Virtual Tour and Headshot Package by nikonic1976@yahoo.com

In the past, if you were an attorney, doctor, financial advisor, or other professional, you didn’t need to worry about web presence. After all, so much of your business was referral or “word of mouth.” Why bother with the hassle or expense of a website or social media? Any good lawyer or doctor wouldn’t need to advertise in this way, all they needed was their reputation.

This environment has changed. Today, people aren’t given a single referral. You might be among several that they are given. How often do you see someone post on Facebook, “anyone know a good plumber?” How many responses do they get? The same is true with professionals. 

So how does the person decide who to call? They Google them. Consumers will search online for more information. Depending on what they find, website, social media, reviews, etc, they will choose who they want to investigate further. If people search for you and find nothing, then likely, nothing is the response you will get.

Glenda Cochran- Birmingham AL Google Trusted Photographer--14

In my personal experience when our pediatrician moved away, we asked friends on Facebook. We got about 10 recommendations. So the first thing I did was sit down and Google them. Based on what I saw online I narrowed it down to three. From phone calls and visits we finally selected a new pediatrician for our four children. Had that doctor not had a website and web presence, I would have never even considered her.

Just having a website and web presence was good enough once upon a time. Now, the landscape has become much more competitive. The quality of websites is steadily improving. An entire industry is devoted to helping websites come out above their competition in search results (SEO). So once you have your website you must make it stand out from the crowd. It must be more appealing and offer more.

One way of doing that is with the quality of photography on your website. So many businesses think that an orange, deer in the headlight, selfie, taken with a smartphone is just fine. However, put yourself in the shoes of your potential client. Doctor #1 has no photos or their terrible, Doctor # has good quality professional photos. Which one do you have more confidence in? The one who obviously takes shortcuts and isn’t concerned about their appearance, or the one who invests in their business and presence? I know which one I would choose!

This is where I can help. I’ve created a special professionals package. With this I create a Google Maps Business View 360º virtual tour of the office. I embed this tour on Google Maps, Google StreetView, Google Search Results, and the Businesses Google + page. This helps the business stand out on Google by making it more visually appealing in the results. People see it more, click on it, and start to interact with you before the first email or phone call is ever made. The tour can even be embedded on the businesses Facebook and web pages, further enhancing their web presence.

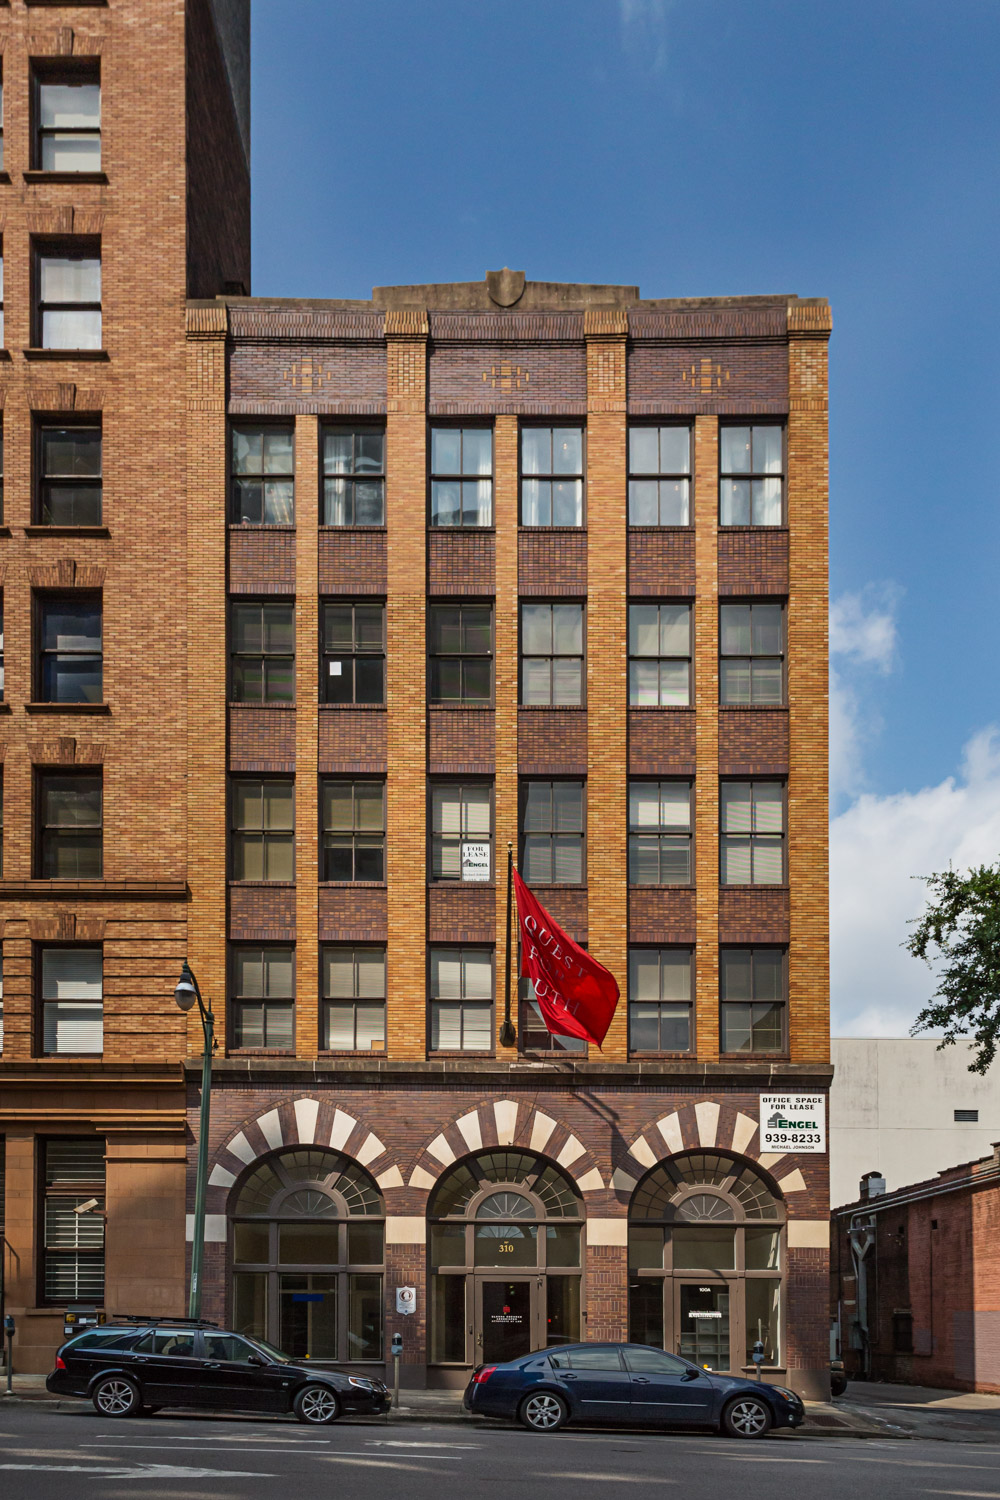
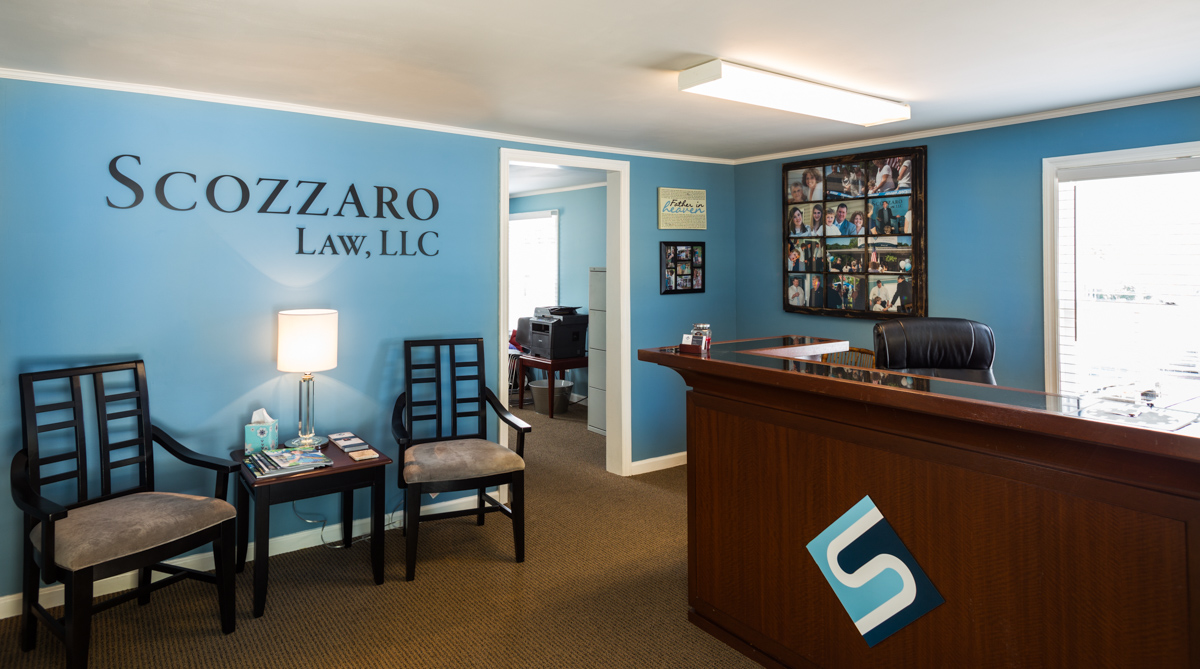
As part of the Google photos I’m also going to create high quality, commercial still images of the office, inside and out. These images can be used on websites, social media, and even print media. This is another way to show off your practice on your website.

Scozzaro Law - Helena Alabama Google Maps Business View-

Lastly, in this socially connected world, people want to have a personal connection with those with whom they do business. Your personality is becoming a more important part of how you are perceived by potential clients. To be effective in marketing you need to be active in social media. LinkedIn, Twitter, Facebook, etc all help you connect with clients and expand awareness of your business. One thing all social media sites, as well as many online directories, have in common is a spot for a profile picture. Fair or not, people will make a judgment about you in the blink of an eye based on the picture. A bathroom mirror smart phone selfie does not give the impression of professionalism. Having a high quality professional portrait, or headshot, is critical. As part of the professionals package I will also create that high quality portrait. This can be used on the website, social media, print media, and anywhere else a profile picture is required.

Take a look at the example below of Clyde Riley Attorney at Law. His is a smaller, more personal, law firm. The 360º tour and photos combined with his portraits, combine to give potential clients a better sense of who he is. When they meet Mr Riley for the first time they will be more comfortable because of the feeling of familiarity with both him and his office. 

Do you think this could be of benefit to your practice or business? Contact me the specific details of your office and business and we will put together a plan that best works for your needs!

click on thumbnail to view full size image

[gallery type="rectangular" ids="2197,2198,2199,2200,2201,2202,2203"]

click and drag to pan, click arrows to move through tour

View Larger Map

Learn more about Clyde Riley on his website and Google + Pages.

Kinsey's Music Journal Profile Photo Creation by nikonic1976@yahoo.com

Amongst photographers, especially ones that like to use flash, David Hobby is pretty famous. He runs a blog called The Strobist, which I highly recommend reading. He will teach you all sorts of amazing stuff about flash photography. Another great resource for photographers is the DigitalRev YouTube channel. They give entertaining lessons, reviews, tips, and all manner of things photographic. I recently saw a DigitalRev video where they set out to replicate David Hobby’s profile pic, and to do it on the cheap. While the video was somewhat informative, they left out a lot of important information about how the shot was created. I have no idea what the camera or flash settings were. Did they use a Gobo (go between, usually black to block light) or reflector? Despite this lack of information, the video did give me a starting point and I wanted to see if I could replicate the image myself. (check it out for yourself below)

Now, you may be saying “Why don’t you create something new? Why are you trying to duplicate something someone else has already done?” Valid question. The reality is that creativity doesn’t work that way. Everything new was built upon the work of others that came before. By recreating what has already been done you can learn new skills and techniques. It also forms the base from which you can modify it into your own creation. So don’t be afraid to copy, just don’t steal the work of others and I always acknowledge those from whom I’ve learned. But I digress...

David is a blogger in addition to being a great photographer. His profile pic is him in front of his laptop with some empty soda cans laying about. It looks like he’s being lit by the laptop screen alone and looks very simple. The truth is that it’s a bit more complicated than that. The light from the laptop really wouldn’t be sufficient and wouldn’t provide the light in the foreground necessary. Besides, David’s blog is The Strobist, not the natural lightest. So you know he used a strobe. I knew I wanted to try and figure out how it was done but I needed a good subject.

My wife, Kelly, has a cousin named Kinsey. Kinsey travels all over the land going to various rock concerts. It’s her passion in life and she’s begun to turn that into a blog. She writes about the concerts she attends and has been able to gain some pretty impressive access to some of the bands and artists. (check out her blog here) Kinsey was staying with us for a couple of days while going to a couple of concerts in the area. She asked if I could take a candid pic of her writing for her profile pics and to use on the blog. I knew right away that I had the perfect subject to recreate David Hobby’s image!

Using the DigitalRev video as a guide, I set up a table in front of a white seamless background. Kinsey’s laptop has LOTS of character in the front, which I love! I wanted to make sure that it was visible. So like the video, I used a snooted (a snoot transforms the light from a flash into a narrow beam) speedlight (Yongnuo YN-560 II) on a stand pointed down at the laptop from the left. I didn’t have a specifically made snoot for this flash so I cut out some black poster board and some gaffers tape. Two minutes later I had a snoot! Using my Sekonic L-558 light meter, I adjusted the flash power level until I got a value of f4.0 at 100 ISO. I wanted the light on the computer to be about 1 stop lower than the main light and I was going for somewhat shallow depth of field.

Tommy Daspit Birmingham Commercial Photographer

Next, I put another YN-560 II on the laptop keyboard with the flash head pointed at the screen. I measured the light bouncing off the screen at the point where Kinsey would be positioned and adjusted the power until it was f5.6 at 100 ISO. (The flash units were triggered by PocketWizard Plus IIIs.)

At first I did a custom white balance but I just felt that the light was too warm. So I put a Blue Honl color correcting gel on the flash at the computer and left the snooted strobe as it was. I set the white balance to daylight to enhance the blue light from the main flash.

David Hobby Profile Pic recreation

From there it was a matter of experimentation to get the accent flash positioned just right to get the desired effect on the laptop front. I took a few images with Kinsey doing various facial expressions and placement of the props until I had what I wanted.

After importing the image into Adobe Lightroom I did a little tweaking of contrast, saturation, and sharpness, but for the most part it was straight out of the camera. No filters or actions were used at all. From there I imported the image into Photoshop CC so I could remove the background and replace it with my own.

Canon 1D Mark III, Sigma EX 50mm 1.4 HSM, Yongnuo 560 II bounced off of laptop screen with Honl Blue Gel, Yongnuo camera right with snoot aimed at laptop, 100 ISO, 1/25th at f5.6. Custom white balance, manual exposure, metered with Sekonic L-558.

Using the Magic Wand tool I selected the areas that I wanted to delete. In this case it was the background. This would have been easier if I’d used a chroma key background, or simply lit it so the tones were bright and even. I didn’t do that in this case because I wanted to first replicate the David Hobby shot and I didn’t want any light reflecting off the background and onto the subject. As it was the background was going to be a little more work but not anything too crazy.

Magic wand used to select areas that I want to delete.

After selecting the area to delete I used the fantastic “Refine Edge” tool. This helps in keeping fine details (like in the hair) while getting rid of what you don’t want. I used the smart radius and feathered the selection a bit and I was ready to go.

Adobe Photoshop CC Refine Edge

Going back into the image I double clicked on the the image layer to unlock it. This will allow me to delete the background and add my own. If you don’t do this then hitting the delete key will fill the area with whatever foreground color is selected or you can use the Content Aware Fill, which is a lesson for another day.

Deleted Background in Adobe Photoshop CC

Next I dropped in the image that Kinsey provided of the band, and scaled it to fit. Voila! That’s all their is to it.

The finished product!

Here is my YouTube video in response to the DigitalRev one where I show how the image was created step by step.

Have questions or comments? Use the comment section below! Never want to miss out on a new how to article or photography tips? subscribe to the blog below and receive automatic notifications of new posts!

Want more photography lessons and tips? Check out my e-book, See the Light - Understanding Digital Photography. Now available in the iTunes book store!

[jetpack_subscription_form]

Commercial Photoshoot for Trade Magazine by nikonic1976@yahoo.com

When you're a commercial photographer you never know what your next assignment might bring. A few days ago I was contacted by the publisher of a Trade Magazine for the funeral industry. The magazine is produced in South Carolina but they were doing an article on a mortuary professor from Jefferson State, here in Birmingham. They needed creative photos of him for the story highlighting his passion for teaching. The publisher wanted high quality and creative images that would compliment the text. After a couple of calls with the professor and publisher I had a few ideas in mind. Still, I would have to see what would work once I was there and could see the facilities first hand. Given that this was a topic and a subject that I'd never attempted to photograph before, I was quite excited. Now, I realize that not everyone considers this type of photography to be their cup of tea, but for me, any day I'm working with a camera in my hand is a good one. I enjoy the challenge of fulfilling my client's vision and getting the best images possible. When I arrived on location the first thing I did was scout the location looking for the best settings. Some of it was already determined by the client. They wanted images of him teaching in class and at his desk. The rest was up to me to figure out. Once I had my locations set, the next thing for me to do was visualize the shots. I took the scene before me and mentally placed the subject, choose my angles, and thought about how I wanted the light to look to properly tell the story. After that, Kelly and I set about getting the lighting, exposures, and equipment set up to make it all a reality. Here are the results with how they were done. Please feel free to comment below with any questions you have.

I needed an image of him teaching in class but a cinder block walled, overhead florescent lit, classroom was less than ideal.  I turned out the lights and used a gridded snoot on a monolight, placed in the center of the room, high, and at a down angle. I wanted dramatic light that would spotlight the subject. I had a speedlight with a blue gel at the left and rear of the class to provide a little fill light on the class. I wanted them to be silhouetted but still somewhat visible. I shot low and to the right using a telephoto lens to compress the distance of the students and to reduce depth of field . Canon 1D Mark III, Canon EF 85mm 1.8 USM, ISO 200, 1/250th of a second, f5.0, manual exposure, custom white balance.

Birmingham Commercial Photograpghers

The second location was the merchandising room where students learned all about the different parts of casket, monuments, etc. The light in the room was overhead florescent light banks. Yuck! See the diagram below to see how I lit this scene. Canon 1D Mark III, Sigma EX 50mm 1.4 HSM, ISO 100, 1/30th (slower shutter speed allowed me to bring in some of the ambient light in the background cubicles.), f4.5, manual exposure, custom white balance, lights triggered by PocketWizards.

Canon 1D Mark III, Canon EF 20mm 2.8 USM, ISO 100, 1/30th (slower shutter speed allowed me to bring in some of the ambient light in the background cubicles.), f4.5, manual exposure, custom white balance, lights triggered by PocketWizards.

Alabama Commercial Photographers

They wanted a more causal image of him at his desk. This could be a boring and flat shot. I wanted to make it a bit more interesting. I used a higher ISO to draw in more of the ambient light from the lamp to add some warmth and character. I positioned my main light (speedlight shot through a softbox), in the hallway and used the front door of the office as a light controller. See the diagram below. I just had him interact with Kelly to get more natural looks and expressions. I didn't want it to be the typical cheesy smile and pretend action. Canon 1D Mark III, Sigma EX 50mm 1.4 HSM, ISO 400, 1/250th, f4.5, manual exposure, custom white balance, speedlihgt triggered by PocketWizard Multimax.

Tommy Daspit Editorial Photographer

Lastly we needed a couple of simple portraits with negative space where copy (text or headlines) could be added. The sky was giving us some dramatic clouds and I wanted to incorporate them into the image. The camera's shutter speed was set to the meter reading for the sky. If I metered for the subject then the sky would be overexposed. Since I was exposing for the sky our subject would have been very dark and underexposed. To prevent that from happening I lit him with a YN-560 speedlight at full power shot through a medium softbox placed to the right, high, and at a down angle. I adjusted my aperture and ISO to make sure my shutter speed was within my camera's maximum sync speed of 1/300th of a second. The flash power was set so that it was correct for the aperture used. In this case it was full power. I composed this image from a downward position looking up to incorporate more of the sky and not the parking lot behind him. This angle also gives the perspective of enlarging the subjects stature.  Since my light was at a down angle there was a shadow under his chin which is a slimming look. Canon 1D Mark III, Canon 85mm 1.8 USM, ISO 100, 1/200th, f10, manual exposure, custom white balance, YN-560 manual speedlight triggered by PocketWizard.

Birmingham AL editorial photographers

Tommy Daspit Editorial Photographer


Want more photography lessons and tips? Check out my e-book, See the Light - Understanding Digital Photography. Now available in the iTunes book store!

[jetpack_subscription_form]